Translate

Saturday, November 10, 2018

Cross Canada Hop: Tis the Season

Welcome to the Cross-Canada Blog Hop!

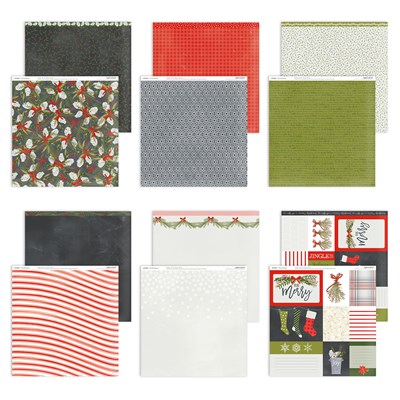
This month, we are featuring the 'Tis the Season paper pack.

product image
You should have arrived here from Arlene's blog This blog hops runs from East to West across Canada so if you want to start at the beginning, go to Michelle's blog  and she has the entire list of bloggers on her blog. 

'Tis the Season is one of my favourite paper packs in the seasonal idea book.   I love the traditional colours .... throw into the mix some ribbons and pine cones and you have something that is very good for me.

I chose to do a layout and a card for this hop.   
Here is the layout:


I also happen to really like the Shaker Card Thin Cuts.  So I chose to make a couple of them on the layout instead of just putting pictures there.  I think it adds an element of fun to the layout.  I added two with patterned paper behind them to accentuate the gold sequins and one I just left blank for now.  I plan to add a photo there and then will add the sequins to it at that time.

Here is the card.


For the card I used one of the decorative borders thin cuts to make the scalloped edge on the inner paper of the card.  I also chose to focus on a shaker element, using one of the picture my life cards that come in the paper pack.  I added Silver and white sequins this time.  They make me think of snow so they are added to it.  Snow is a part of our Christmases here in Canada and Christmas with snow just makes it so much more...well... just Christmas! 

As you hop through, all the way across Canada, please leave a comment about our artwork.  If you see something that you are interested in, please contact me or your local Close to my Heart consultant for more information.

Please join us again when our theme will be artwork from the 'Oh What Fun' paper pack. In the meantime, head on over to Brandi's blog to see the great artwork that she has prepared for us.


Tuesday, September 11, 2018

September Cross Canada Blog Hop - Boutique

Welcome to our Boutique Blog Hop featuring artwork created using the Boutique paper collection. To purchase any of the items seen in our blog hop today, contact your local consultant to place an order.

We hope that you will take the time to leave comments on our posts, as we love to get feedback from our viewers....whether it was something that you really liked or some new technique that was used that you would like to learn how to do....by leaving us comments, we get to hear what you like, and what you want to see. Thank you… now on to our hop!

If you have just hopped onto my blog, you can start here as this is a circular hop.  If you came from Krista's  blog, then you are in the right place.

Boutique is the paper pack feature for this month.I have chosen to do a layout for this hop.  No stamping on this layout, just a bit of fussy cutting.

I chose to use the papers that are very soft in hue, as opposed to the deeper colours.  This paper pack is very versatile in that way.  You can make you layout very soft and feminine or you can make it more masculine.

Here is my layout:


Some of the details of the right side, showing some of the fussy cutting  (the rose and the arrows)


Materials Used: 


Now go and check out the artwork that Brandi has made.  She is the next stop on the hop across Canada.

If you get lost along the way go to Michelle's blog.  She has the complete list for this hop.

Thanks for hopping along with us - we hope we were able to inspire you to get creative using some of the designs, products and techniques seen along the way. We hope you will join us again next month when we will be featuring artwork using the new Hello Pumpkin and  Grateful Heart collections, So mark October 10th on your calendars and hop along with us.


Friday, March 10, 2017

March Team Brae-er Blog Hop...Dreamin' Big

Welcome to the March blog hop for the Brae-ers, where we will be featuring projects created with the Dreamin' Big paper pack.
If you have just hopped onto my blog, you can start here as this is a circular hop, but if you get lost youcan find your way by going to Brae's blog for a full list of participants.  If you came from Sheena's Blog then you are in the right place.

We hope that you will take the time to leave comments on our posts, as we love to get feedback from our viewers...whether it was something that you really liked or some new technique that was used that you would like to learn how to do...by leaving us comment, we get to hear what you like and what you would like to see.
Thank you....now on to our hop!

Dreamin' Big caught my attention right away.  I love the colors...there are so many of them in this paper pack...and they are so bright and cheery.

I chose to do another album with this paper pack.  I am not quite finished with it yet, but I do have the cover page all completed.  So that is what I am going to reveal for now...the rest is coming but you will have to be patient.


   I love the airiness of this page.  The wreath and the flowers were cut from the CTMH Flower Market Cartridge and the title "SWEET" comes from the CTMH Artbooking Cricut Cartridge.  Both of these cartridges are wonderful additions to any cricuteer's collection.  I get lots of use from them.

Other products used in this layout are:
pink enamel gems for the centres of the pink flowers (They seem to be a little off color on this picture of the layout.
Bitty Sparkles to add a little more bling.  What girl doesn't love more bling?
Shimmer Brush - Clear I brushed all the flowers with the shimmer brush.  I like the softness that the shimmer gives to the flowers.
Shimmer Brush - Gold for the centres of all the yellow and seaglass flowers.
Embossing Tool to give dimension to all the flowers.  Do this before brushing the shimmer on and also before attaching the flowers to the page.
Foam Tape I used this to pop up the title and also the photo mat.
Liquid Glass to adhere the flowers and the wreath to the page.   Cut into the wreath and place part of it under the photo mat.  I find this helps to keep the true shape of the wreath.

The next stop in this hop is Emily's Blog.  Thanks for hopping with us...we hope we were able to inspire you to create your own projects from those that you have seen along the way.   Please come back again next month when we will have more projects to share with you.

Have a great weekend!

Sunday, February 5, 2017

Hello Lovely 10 Page Album

       I have been absent from the blogger world for a long time and now it is time to get back to it. Life has been extremely busy...business has taken me away from this blog for too long. I have set up a scrapbooking retreat centre called Country Escapes and it is up and running now. Come visit my website: www.countryescapes.ca and have a look. Book a weekend away with some of your friends and let us pamper you with fantastic food and lots of fun all weekend. Also like us on our Facebook page: Country Escapes.

       Now that that is done I can devote more time to being creative in the paper world. I have designed a 10 page album with one of my favourite paper packs this season and I am proud to be able to offer it to you as a workshop for customers and consultants alike.  If you would like it for free all you have to do it place a qualifying $35 or more order on my Close to My Heart website: www.lucyimrie.closetomyheart.ca (if you are in Canada.)  If you are not in Canada but would like to purchase the files for this kit just send me an email or use the PayPal option at the end of this post. 


                                                      WORKSHOP FILES - $12


Here are the pages in closer detail:


This kit requires the following supplies:
In the Workshop Files you will find:
  • Cutting Guide
  • Photos of each Layout
  • Tips and Hints
  • Consultant Release
I hope that you enjoy this album, whether it be for yourselves, your customers, or for a gift.

Have a great day!


Wednesday, July 15, 2015

Cross Canada Blog Hop: Operation Smile


Welcome to our July Blog Hop featuring the current Operation Smile Stamp Set, Happy Everything. When you purchase this stamp set , Close To My Heart will donate $3 to Operation Smile, a non-profit organization that performs life-altering surgeries what will give children confidence for a lifetime. They have performed over 220,000 surgeries since being founded in 1982.  To purchase any of the items seen in our blog hop today, contact your local consultant to place an order.

We hope that you will take the time to leave comments on our posts, as we love to get feedback from our viewers....whether it was something that you really liked or some new technique that was used that you would like to learn how to do....by leaving us comments, we get to hear what you like, and what you want to see. Thank you… now on to our hop! 

If you have just hopped onto my blog, you can start here as this is a circular hop, but if you want to follow us across Canada then please start at the beginning and join Michelle at My Creations with \Michelle.  If you came from Sheri's blog then you are in the right place! 


I started with this very quick card using Seaside paper and the Seaside Greetings stamp set (D1609) for the boat and the clouds.   The Happy Birthday comes from the Happy Everything Operation Smile stamp set (D1563).   This card was finished off by using some Glacier Extra Thick Twine(Z3039) and some sequins from the Oceanside Sequins pack (Z3041)


This card took a little more time but I love how it turned out.  Again I used the Seaside paper and used the Happy Everything Operation Smile stamp set for the sentiment. I used the Treasured Friendship stamp set ( C1594) for the shells on the bottom portion of the card.


This card is made using the Jackson PML cards and it was a lot of fun altering it to fit what I wanted it.  The stamping on this card is all from the Happy Everything Operation Smile stamp set (D1653)

Close Up of the message...masking of a sentiment in order to make it look like it was typed .  The bee is coming in to agree that you are a one-of-a-kind, fabulous peron!


The message inside the card.  Ordinarily I would put this on the outside of the card but it just did not fit on the typewriter paper so I got creative and with a couple of extra little dots on the front message this fit well as a sentiment for the inside.


This last card is my favourite one that I made for this post.  I used the Have a Happy Day stamp set (D1616) for the flowers and the circle,   The sentiment is from the operation smile stamp set.  I am just so pleased with how this turned out.   This card screams HAPPY to me.
I did not have any canary cardstock so I made my own by direct inking to the paper.  The variations in the color are there on purpose, imitating the dappled light of sunshine.  I stamped the sentiment onto the glacier stamped circle and then fussy cut the whole thing and popped it off the card with pop dots.

Let me know which one is your favourite one!  I would be HAPPY to know!


Your next stop on the Cross Canada Hop is Heather Myers of Inky Hugs
 If you get lost along the way, you can head to Michelle Stewart's  blog as she has the complete blog list. 


Thanks for hopping along with us - we hope we were able to inspire you to get creative using some of the designs, products and techniques seen along the way. We hope you will join us again next month when we will be featuring the Projects full of Summer Fun.  So mark August 15th on your calendars and hop along with us.

Monday, June 15, 2015

Cross Canada Blog Hop : Mini Albums

Welcome to our blogging trip across Canada.  This month we are featuring mini albums.  This blog is circular in nature so if you came from Sheri Ballentyne's blog,  you are in the right place.  If you started here then just follow the links, or if you prefer to start at the east coast and work you way across Canada then start at Michelle's blog. If you get lost then you can come back to her blog as she has the complete list there.   Enjoy all the art work that everyone has made!

For my mini album I chose to use the Blossom paper and Complements along with some additional cardstock  and this is what I came up with.
For this album I took 2 sheets of Daisy white cardstock and cut them into 6" strips and scored them at the 6" mark.  I then took another Daisy White sheet and cut it into 6" squares.  Each of those pieces were scored at the 1" mark on one side and then glued to a 6" strip, making 4 17" strips.  These were then glued together in various ways to form the pages of the album.

Then came the fun part: decorating the pages.  I went to my Cricut and cut various cards for this album, some of them actual greeting cards, some of them PML cards, and some sleeves. So here is the results of my "playing".  I will warn you that this post is very picture heavy.


Front cover


Pages 2 (a pocket and 2 PML cards cut with the Cricut)  and flap. 
 This is actually a card from the Artfully Sent Cartridge, created to be a part of the album. The tree is backed with Bamboo cardstock and then filled in with liquid glass to make it more durable.


Pages 2 and 3 with top of  'card' open. Room for 3 small pictures and a bigger on the left side of the 'card'.


Pages 2 and 3 with flap open.   Page 3 is a gatefold feature.
The flap is on the right side and features a sleeve and tag.  


Pages 2 and 3 with gatefold open. Spaces for 6 pictures.


Flap on the left side of page 4 and Page 5.  
The element on the flap opens up to reveal a pop up with room for a picture and some journalling.
Page 5 has room for a 5.5x5.5" picture or 4 2.5x2.5" pictures.

Page 4 flap and Page 5 with top of flap element open.


Pages 4 and 5 with flap open.
Page 4 has room for a 5x5" picture.
The flap is another card from the Artfully Sent Cartridge, one that I have loved since I saw it at convention last year. This card also opens, revealing....

this...room for more pictures, a 2x3" and a 3x4".


Flap on left side of  Page 6 and Page7 


Pages 6 and 7 with flap open.
Space for journalling on the flap side and 4 2x2" pictures on page 6.  Page 7 has room for l larger horizontal picture or 2 smaller pictures.


Page 8 and top of flap on the right side of Page 9.
Page 8 features a pocket and 2 tags, one of them a PML card from the Artfully Sent cartridge, the other from the Blossom Complements.


Pages 8 and 9(Room for a 3.5x5" photo)  with flap open.


Close up of flap on page 9.  
The journalling spot is backed with White Daisy cardstock and then popped off the page with foam dots. This is probably my favourite page in the album.  I have seen the starburst element in pages but did not try it yet.  So I tried this and I must say I am quite pleased with the results.


The back cover (picture not shown) is made with the small print that is used on the bottom of the front cover.  The spine is a continuation of the orange on the side of the front cover and goes to the back too,

I hope you enjoyed seeing what I have been up to.  I would love to have you leave me a comment to let me know what you loved best in this album.  I am looking forward to filling it with pictures...probably flowers and blossoms...some of my favourite things in God's creation.

Now it is time to go further west in our cross Canada journey.  Hop onto Brae Montgomery's blog and enjoy the artwork that she has to show you.  See you next month when we will be featuring artwork using the Operation Smile stamp set.


Products Used in this project:
Blossom paper X7196B
Sunset Ink Z2191
Pear Ink Z2197

Twilight Ink ( retired)

Score Board Z1937

Extra Sheet of Bamboo cardstock

Extra Sheet of Sunset cardstock

Adhesives
Foam Tape


Until next time, take care and enjoy your summer.   

Lucy  :)

Tuesday, May 19, 2015

A Taste of Summer Cards

My second last post featured the paper strawberry wreath and I had left over paper from the two patterned paper sheets that I used.  So I put them to use and made these cards with it.
Card 1

Card 2

Card 3

Card 4

Card 5

Card 6

Materials used:
Taste of Summer Paper Pack CC1038 (Available May 2015 only) 
Dimensional Foam Tape Z1151 (Cards 1,2,3,4,6)
Scallop Border Punch Z1851 
Corner Rounder Z1912
Gold shimmer trim ,Z3042 (Cards 1,3,4,5)
Coral Reef Sequins z1985 (Cards 2,3,4,5)
Happy Birds Stamp Set C1600 (Cards 2,3,6)
Balloon Talk Stamp Set S1404 (retired) (Cards 1,4,6)
For All Occasions D1187  (retired)  (Cards 2,5)

If you would like to do this set of cards as a workshop please let me know and I will see to it that you get one. $25.00 for six cards precut and stamped. Instructions will be provided...all you have to do is finish them. S&H extra.